Thank you so much for checking out this adorable album I made by using an actual children's book as a template. If you have any questions regarding the directions or measurements, please feel free to contact me. The meteric measurements are available using a converter calculator found on Google Search. I will plan to add them in future templates.
This is the Pop-up House Book that I created. The cover, front and back, is from a recyled book cover that I decoupaged following Jann at WhatYouMakeIt1's YouTube Channel. You can watch the details of the book and the directions in upcoming videos on my YouTube Channel.
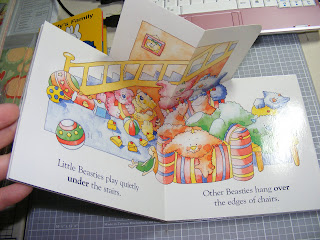
This is the book that I had planned to take a part and use it since I only paid $.20 for it at a thrift store, but once I saw what in great shap it was in...I decided to copy and donate the book to Children's Rehabilitation Service (follow the link in the right margin for more information).
This book also has a surprise element that I incorporated into my own mini scrapbook album...it is a pop up book and each page section has a different shaped pop up...that is what I also added to my mini album. =)
This is the template for the pages that go inside the book. Cut on the fold of your paper. Cut one for each page section of your book.
This is the template for the pop up portion of the mini album. Cut one for each page section of your book.
The template cut out. The dashes are the fold line for the pop up book. The triangles are the bottom of the page are the supports for the pop up of your book.
I used a hole punch to make a marker point so that I could easily fold the pop up supports without making the fold line on my paper.
This is my envelope measurements for the envelope. I didn't measure and mark all my envelopes, I simply added them to the back of the pages and cut the top off usinig the page edge as my guide. However, to make my first envelopes the measurements helped tremendously.
Although I recycled a book cover for my mini album, I still cut it a little larger than my actual book. So, if you wish to make your album using chipboard, then cut it a little larger than your page. I also cut the cover to my mini after I put the pages together.
The envelopes are added to the backside of each page section using double sided adhesive.
However, see the next photo to understand why I would add the pop up section before the envelopes. I apologize for not doing so in this guide.
I found that if I had added the pop up portion before putting the envelopes down, I wouldn't have had the edges of the pop up supports catching on the tags inserted from the sides. Keep following the directions and this should make sense.
At this point, I used my decorative scissors to create the desired edging for the pop up I wanted to create for this page section.
Add the double sided tape to the top, inside edge, and the bottom. Leave the page outside edge without tape because you will create an additional slot for a tag by leaving it open. Then you will attach the envelop with the next page and continue to the end. The last two pages will look like this and will be added to the inside of the front cover and the back cover. On mine you will see on the video that I added a pocket to the front and back. I plan to open mine into a circle to display for our open house when our forever remodeling/building is completed on our house.
On this project I used the be loved paper kit by My Mine's Eye...
I should have the YouTube video posted by Monday morning...
Thank you!! Please contact me if you have any question regarding this album.
Love, Blessings, &{{{Hugs}}},
Rita


1 comments:
This was such a clever idea. I'll be on the look out for children's books from now on.
Post a Comment